摘要:基于inception的自动化SQL操作平台
开发语言和推荐环境
python:3.4
django:1.8
mysql : 5.6及以上
linux : 64位linux操作系统均可
环境准备
1、克隆代码到本地: git clone https://github.com/jly8866/archer.git 或 下载zip包
2、安装mysql 5.6实例,请注意保证mysql数据库默认字符集为utf8或utf8mb4
3、安装inception
安装所需软件和模块
安装python3
cd /src wget https://www.python.org/ftp/python/3.4.1/Python-3.4.1.tgz mkdir -p /opt/python3 tar -zxvf Python-3.4.1.tgz cd Python-3.4.1 ./configure --prefix=/opt/python3 && make && make install 将/opt/python3/bin加入环境变量 [root@mysql3]# python3 Python 3.4.1 (default, Apr 15 2017, 14:11:11) [GCC 4.4.7 20120313 (Red Hat 4.4.7-18)] on linux Type "help", "copyright", "credits" or "license" for more information. >>> exit()
|
[root@mysql3 ~]# wget --no-check-certificate https://pypi.python.org/packages/source/s/setuptools/setuptools-19.6.tar.gz#md5=c607dd118eae682c44ed146367a17e26 [root@mysql3 ~]# tar -zxvf setuptools-19.6.tar.gz [root@mysql3 ~]# cd setuptools-19.6 [root@mysql3 setuptools-19.6]# python3 setup.py build [root@mysql3 setuptools-19.6]# python3 setup.py install ... ... creating 'dist/setuptools-19.6-py3.4.egg' and adding 'build/bdist.linux-x86_64/egg' to it removing 'build/bdist.linux-x86_64/egg' (and everything under it) Processing setuptools-19.6-py3.4.egg Copying setuptools-19.6-py3.4.egg to /opt/python3/lib/python3.4/site-packages Adding setuptools 19.6 to easy-install.pth file Installing easy_install script to /opt/python3/bin Installing easy_install-3.4 script to /opt/python3/bin Installed /opt/python3/lib/python3.4/site-packages/setuptools-19.6-py3.4.egg Processing dependencies for setuptools==19.6 Finished processing dependencies for setuptools==19.6 可以看到安装到python3下面了
|
安装pip
[root@mysql3 ~]# wget --no-check-certificate https://pypi.python.org/packages/source/p/pip/pip-8.0.2.tar.gz#md5=3a73c4188f8dbad6a1e6f6d44d117eeb [root@mysql3 ~]# tar -zxvf pip-8.0.2.tar.gz [root@mysql3 ~]# cd pip-8.0.2 [root@mysql3 pip-8.0.2]# python3 setup.py build [root@mysql3 pip-8.0.2]# python3 setup.py install ... ... creating 'dist/pip-8.0.2-py3.4.egg' and adding 'build/bdist.linux-x86_64/egg' to it removing 'build/bdist.linux-x86_64/egg' (and everything under it) Processing pip-8.0.2-py3.4.egg creating /opt/python3/lib/python3.4/site-packages/pip-8.0.2-py3.4.egg Extracting pip-8.0.2-py3.4.egg to /opt/python3/lib/python3.4/site-packages Adding pip 8.0.2 to easy-install.pth file Installing pip3 script to /opt/python3/bin Installing pip3.4 script to /opt/python3/bin Installing pip script to /opt/python3/bin Installed /opt/python3/lib/python3.4/site-packages/pip-8.0.2-py3.4.egg Processing dependencies for pip==8.0.2 Finished processing dependencies for pip==8.0.2
|
安装Django
使用pip3安装:pip3 install Django==1.8.17
或者单独下载安装:
[root@mysql3 ~]# wget https://pypi.python.org/packages/44/41/bf93934082e9897a56a591a67bacbd9fb74e71244f3f42253432a9e627e6/Django-1.8.17.tar.gz#md5=e76842cdfbcb31286bd44f51e087a04c [root@mysql3 ~]# tar -zxvf Django-1.8.17.tar.gz [root@mysql3 ~]# cd Django-1.8.17 [root@mysql3 Django-1.8.17]# python3 setup.py install [root@mysql3 Django-1.8.17]# python3 Python 3.4.1 (default, Apr 15 2017, 14:11:11) [GCC 4.4.7 20120313 (Red Hat 4.4.7-18)] on linux Type "help", "copyright", "credits" or "license" for more information. >>> django.VERSION (1, 8, 17, 'final', 0) >>> exit()
|
安装Crypto和pymysql
[root@mysql3 ~]# pip3 install Crypto
[root@mysql3 ~]# pip3 install pycrypto
[root@mysql3 ~]# pip3 install pymysql
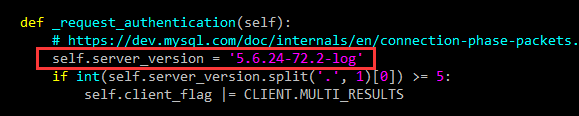
[root@mysql3 ~]# vi /opt/python3/lib/python3.4/site-packages/pymysql/connections.py
在if int(self.server_version.split(‘.’, 1)[0]) >= 5: 这一行之前加上以下这一句并保存,记得别用tab键用4个空格缩进:
self.server_version = ‘5.6.24-72.2-log’
修改后如下图:
配置archer
1、将archer-master源码解压到/opt/archer目录
[root@mysql3 archer-master]# mkdir -p /opt/archer [root@mysql3 archer-master]# scp -r /src/archer-master /opt/archer/ [root@mysql3 archer-master]# cd /opt/archer/ [root@mysql3 archer]# ls archer debug.sh docs manage.py README.md requirements.txt screenshots sql startup.sh stop.sh
|
2、创建archer DB和inception DB
root@(none) 04:04:54>create database archer; Query OK, 1 row affected (0.00 sec) root@(none) 04:05:12>grant all on archer.* to archer_rw@'%' identified by 'archer_rw'; Query OK, 0 rows affected (0.03 sec) root@(none) 04:06:42>flush privileges; Query OK, 0 rows affected (0.02 sec) root@(none) 04:13:39>create database inception_db; Query OK, 1 row affected (0.00 sec) root@(none) 04:13:46>grant all on inception_db.* to incep_rw@'%' identified by 'incep_rw'; Query OK, 0 rows affected (0.00 sec) root@(none) 04:14:23>flush privileges; Query OK, 0 rows affected (0.00 sec)
|
3、修改/opt/archer/archer/settings.py,如下内容:
#该项目本身的mysql数据库地址 DATABASES = { 'default': { 'ENGINE': 'django.db.backends.mysql', 'NAME': 'archer', 'USER': 'archer_rw', 'PASSWORD': 'archer_rw', 'HOST': '192.168.1.3', 'PORT': '3306' } } #inception组件所在的地址 INCEPTION_HOST = '192.168.1.123' INCEPTION_PORT = '6669' #查看回滚SQL时候会用到,这里要告诉archer去哪个mysql里读取inception备份的回滚信息和SQL. #注意这里要和inception组件的inception.conf里的inception_remote_XX部分保持一致. INCEPTION_REMOTE_BACKUP_HOST='192.168.1.3' INCEPTION_REMOTE_BACKUP_PORT=3306 INCEPTION_REMOTE_BACKUP_USER='incep_rw' INCEPTION_REMOTE_BACKUP_PASSWORD='incep_rw'
|
4、通过model创建archer本身的数据库表
[root@mysql3]# cd /opt/archer [root@mysql3 archer]# python3 manage.py makemigrations No changes detected [root@mysql3 archer]# python3 manage.py makemigrations sql Migrations for 'sql': 0001_initial.py: - Create model users - Create model master_config - Create model workflow [root@mysql3 archer]# python3 manage.py migrate Operations to perform: Synchronize unmigrated apps: messages, staticfiles Apply all migrations: sessions, auth, contenttypes, sql, admin Synchronizing apps without migrations: Creating tables... Running deferred SQL... Installing custom SQL... Running migrations: Rendering model states... DONE Applying contenttypes.0001_initial... OK Applying contenttypes.0002_remove_content_type_name... OK Applying auth.0001_initial... OK Applying auth.0002_alter_permission_name_max_length... OK Applying auth.0003_alter_user_email_max_length... OK Applying auth.0004_alter_user_username_opts... OK Applying auth.0005_alter_user_last_login_null... OK Applying auth.0006_require_contenttypes_0002... OK Applying sql.0001_initial... OK Applying admin.0001_initial... OK Applying sessions.0001_initial... OK 查看表是否创建成功: [root@mysql3 archer]# mysql -uarcher_rw -parcher_rw -h192.168.1.3 -P3306 -Darcher -e "show tables;" Warning: Using a password on the command line interface can be insecure. +----------------------------+ | Tables_in_archer | +----------------------------+ | auth_group | | auth_group_permissions | | auth_permission | | django_admin_log | | django_content_type | | django_migrations | | django_session | | sql_master_config | | sql_users | | sql_users_groups | | sql_users_user_permissions | | sql_workflow | +----------------------------+
|
5、创建django admin管理员
[root@mysql3 archer]# python3 manage.py createsuperuser Username: admin Email address: river_dba@foxmail.com Password: admin123 Password (again): admin123 Superuser created successfully. 该用户可以登录django admin来管理model。
|
启动acher
[root@mysql3 archer]# vi debug.sh #!/bin/bash python3 manage.py runserver 0.0.0.0:9123 [root@mysql3 archer]# sh debug.sh Performing system checks... System check identified no issues (0 silenced). April 15, 2017 - 16:39:11 Django version 1.8.17, using settings 'archer.settings' Starting development server at http://0.0.0.0:9123/ Quit the server with CONTROL-C.
|
创建archer系统登录用户
通过浏览器访问http://192.168.1.123:9123/admin/sql/users/
可以看到django登录界面:
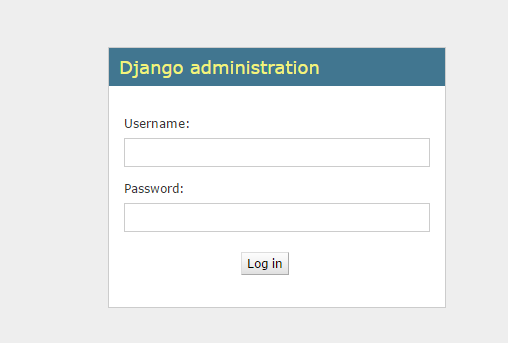
使用上面第5步创建的用户名密码(admin/admin123)登录:
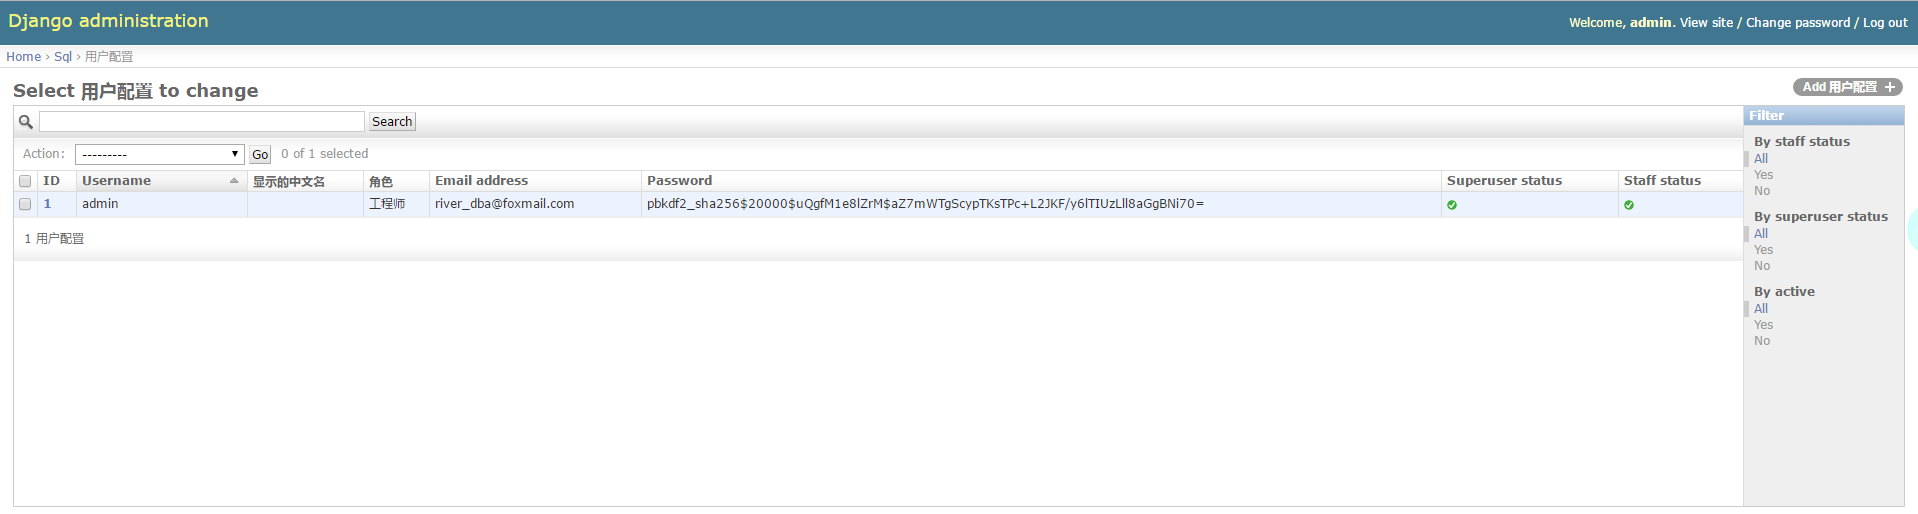
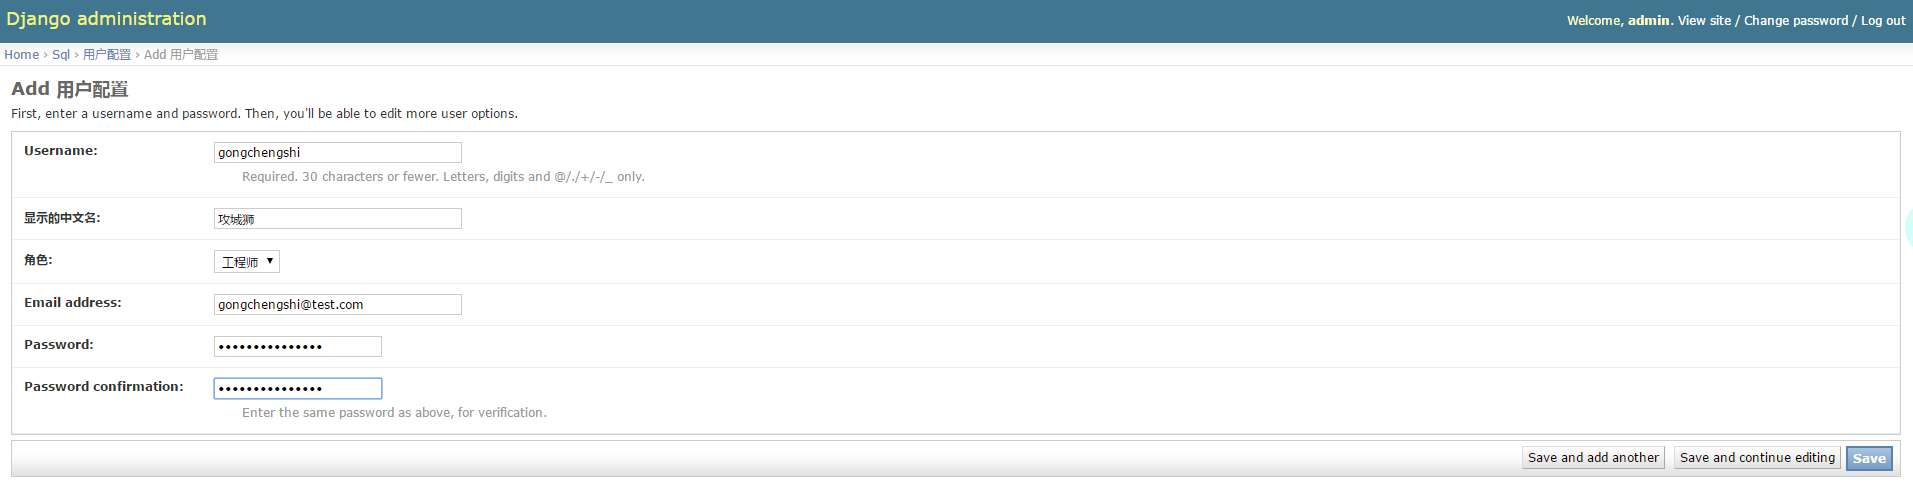
点击右侧Add用户配置,用户名密码自定义,至少创建一个工程师和一个审核人(用admin用户可以登录)后续新的工程师和审核人用户请用LDAP导入sql_users表或django admin增加
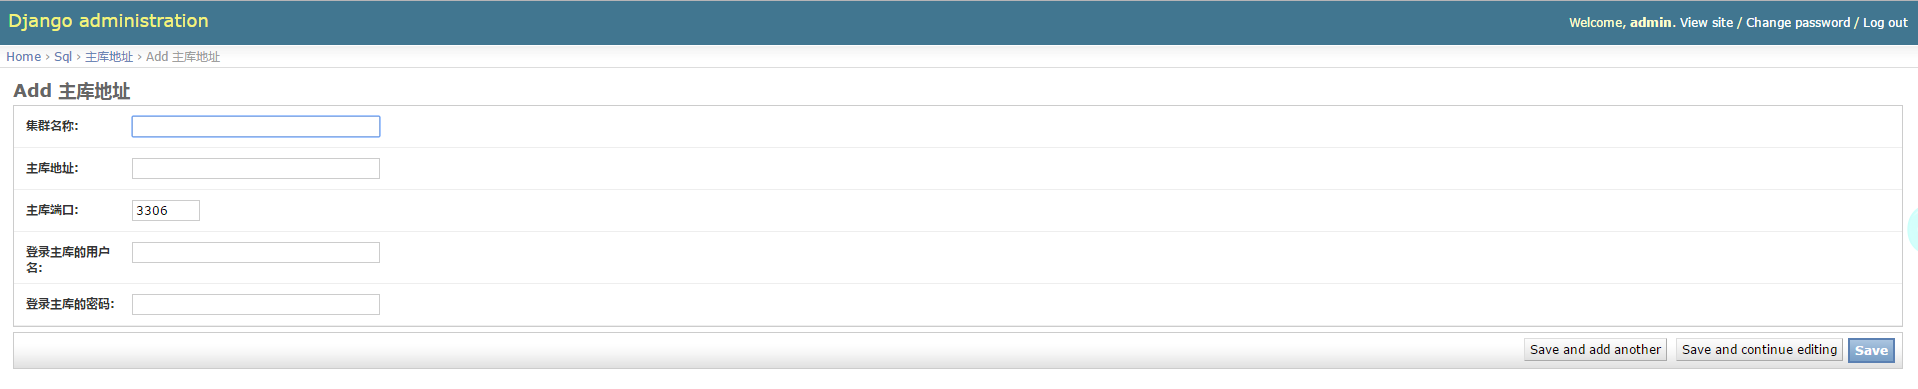
配置主库地址
通过浏览器访问http://192.168.1.123:9123/admin/sql/master_config
点击右侧Add master_config。这一步是为了告诉archer你要用inception去哪些mysql主库里执行SQL,所用到的用户名密码、端口等。

正式访问主页
http://192.168.1.123:9123/login/
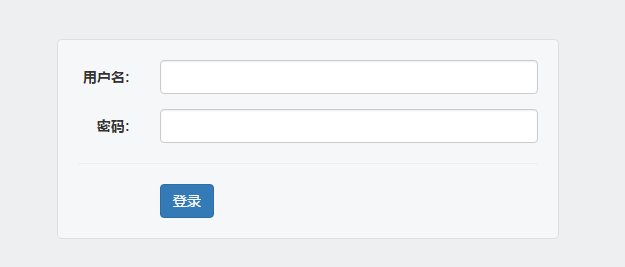
登录成功后:

遇到问题及解决
查看回滚SQL时报错
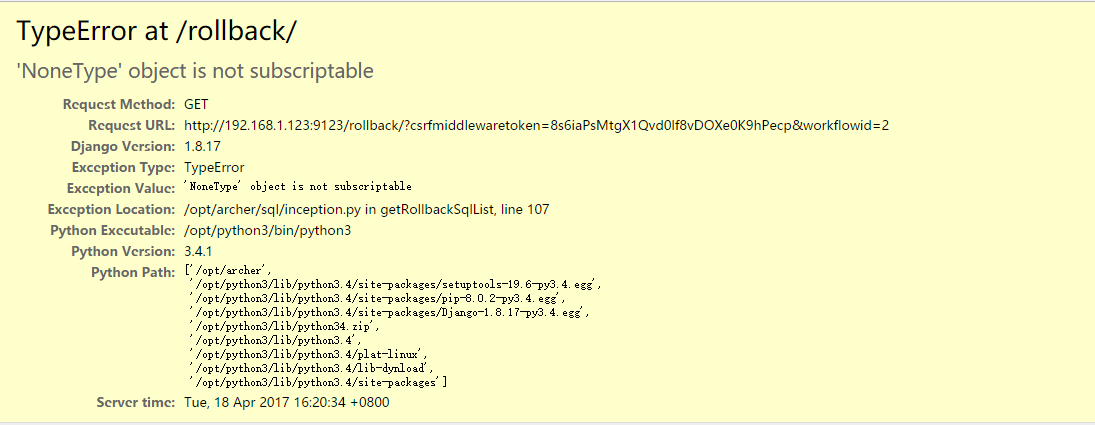
debug日志报错:
[18/Apr/2017 11:49:50] "GET /detail/2/ HTTP/1.1" 200 7474 Mysql Error 1142: SELECT command denied to user 'incep_rw'@'192.168.1.123' for table '$_$inception_backup_information$_$' Error: returned listTables more than 1. [18/Apr/2017 11:50:01] "GET /rollback/?csrfmiddlewaretoken=8s6iaPsMtgX1Qvd0lf8vDOXe0K9hPecp&workflowid=2 HTTP/1.1" 500 73965
|
解决办法:给incep_rw用户赋予select、create、insert权限
root@mysql 04:42:04>grant select,create,insert on *.* to incep_rw@'%' identified by 'incep_rw'; Query OK, 0 rows affected (0.00 sec) root@mysql 04:54:23>flush privileges; Query OK, 0 rows affected (0.00 sec)
|
CREATE权限用于创建表或者库的,INSERT权限用于插入备份数据的,SELECT权限用于查询回滚SQL。
再次执行update语句,查看回滚SQL为空,审核结果显示:
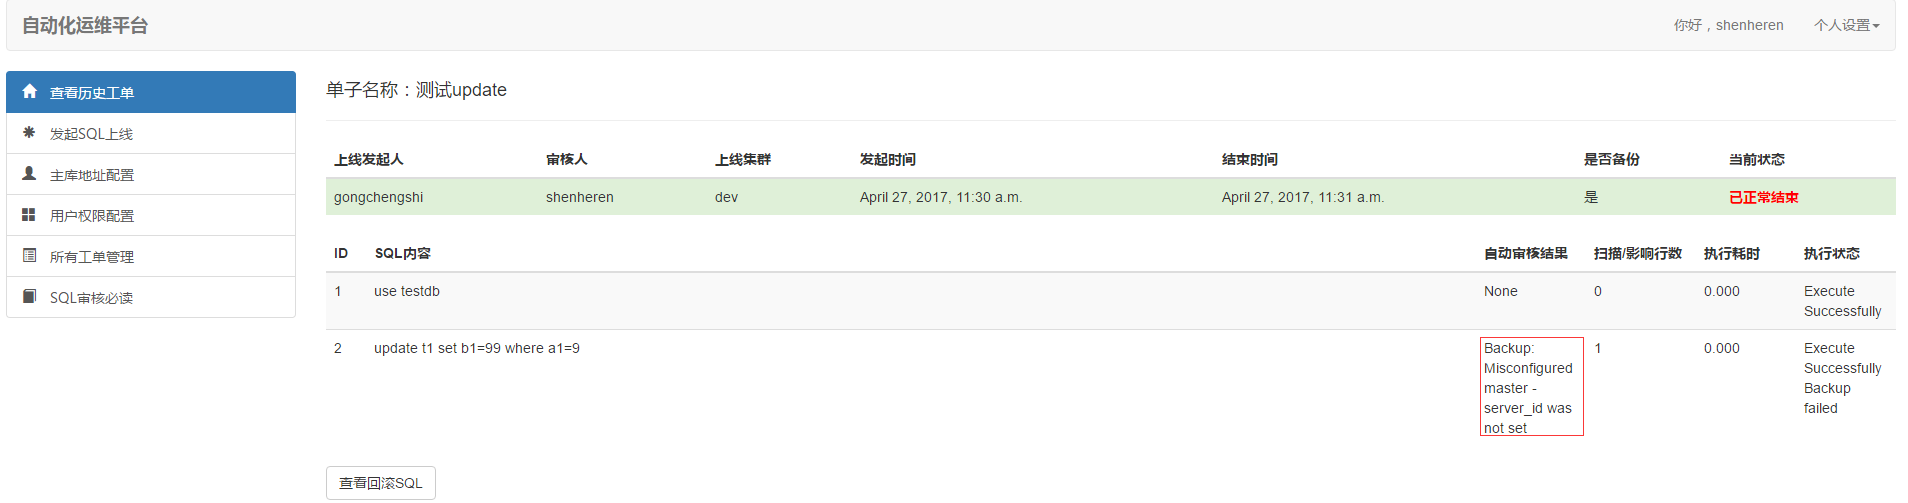
解决办法:为mysql添加server_id